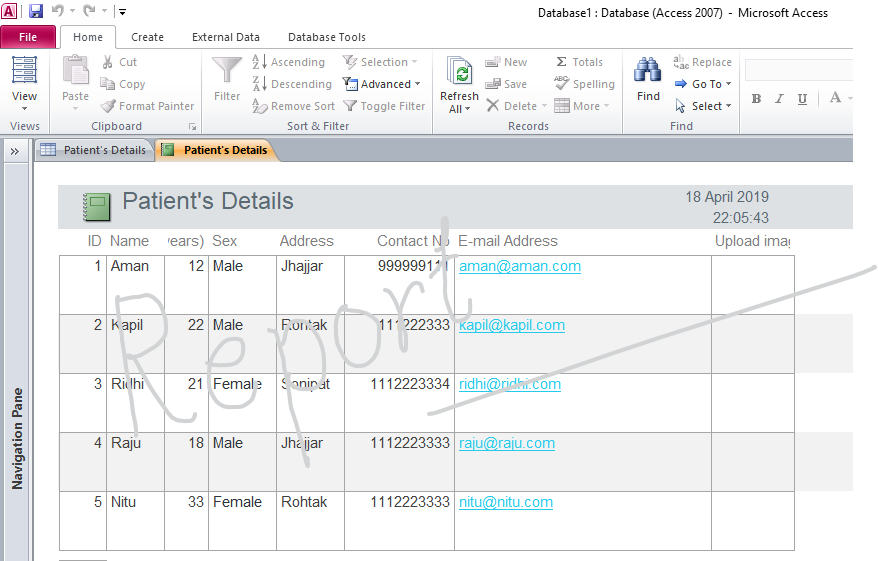
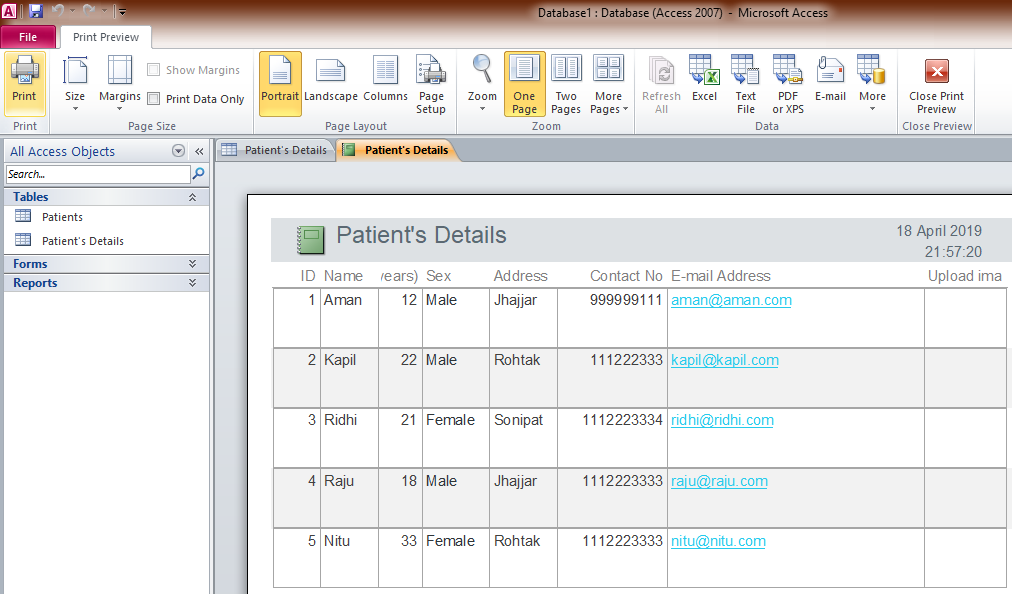
Generating report and printing the report from patient database
Reports offer a way to view, format, and summarize the information in your Microsoft Access database. If you need to share information from your database with someone but don't want that person to actually work with your database, consider creating a report. Reports allow you to organize and present your data in a reader-friendly, visually appealing format. Access 2010 makes it easy to create and customize a report using data from any query or table in your database.
A report is a database object that comes in handy when you want to present the information in your database for any of the following uses:
- Display or distribute a summary of data.
- Archive snapshots of the data.
- Provide details about individual records.
- Create labels.

Creating a report in Access
You can create reports for you Access desktop database by following the steps below:Step 1: Choose a record source
The record source of a report can be a table, a named query, or an embedded query. The record source must contain all of the rows and columns of data you want display on the report.
- If the data is from an existing table or query, select the table or query in the Navigation Pane, and then continue to Step 2.
- If the record source does not yet exist, do one of the following:
- Continue to Step 2 and use the Blank Report tool, Or
- Create the table(s) or query that contains the required data. Select the query or table in the Navigation Pane, and then continue to Step 2.
Step 2: Choose a report tool
The report tools are located on the Create tab of the ribbon, in the Reports group.Step 3: Create the report
- Click the button for the tool you want to use. If a wizard appears, follow the steps in the wizard and click Finish on the last page.
- Access displays the report in Layout view.
- Format the report to achieve the looks that you want:
- Resize fields and labels by selecting them and then dragging the edges until they are the size you want.
- Move a field by selecting it (and its label, if present), and then dragging it to the new location.
- Right-click a field and use the commands on the shortcut menu to merge or split cells, delete or select fields, and perform other formatting tasks.
- In addition, you can use the features described in the following sections to make your report more attractive and readable.
Add grouping, sorting, or totals
The fastest way to add grouping, sorting, or totals to a desktop database report is to right-click the field to which you want to apply the group, sort, or total, and then click the desired command on the shortcut menu.You can also add grouping, sorting, or totals by using the Group, Sort, and Total pane while the report is open in Layout view or Design view:
- If the Group, Sort, and Total pane is not already open, on the Design tab, in the Grouping and Totalsgroup, click Group & Sort.
- Click Add a group or Add a sort, and then select the field on which you want to group or sort.
- Click More on a grouping or sorting line to set more options and to add totals.
Highlight data with conditional formatting
Access includes tools for highlighting data on a report. You can add conditional formatting rules for each control or group of controls, and in client reports, you can also add data bars to compare data.To add conditional formatting to controls:
- Right-click the report in the Navigation Pane and click Layout View.
- Select the required controls and on the Format tab, in the Control Formatting group, click Conditional Formatting.
Tip: To select multiple controls, hold down the CTRL key and click the controls.
- In the Conditional Formatting Rules Manager dialog box, click New Rule.
- In the New Formatting Rule dialog box, select a value under Select a rule type:
- To create a rule that is evaluated for each record individually, select Check values in the current record or use an expression.
- To create a rule that compares records to each other by using data bars, click Compare to other records.
- Under Edit the rule description, specify the rule for when the formatting would be applied as well as what formatting should be applied, and then click OK.
- To create an additional rule for the same control or set of controls, repeat this procedure from step 4.
Customizing color and fonts
Try an App Theme options to customize the color and fonts.- Open a report in Layout view by right-clicking it in the Navigation Pane and then clicking Layout View.
- From the Report Layout Tools options, on the Design tab, click Themes and point the cursor over the various themes in the gallery to preview the effects. Click on a theme to select it, and then save your report.
- Use the Colors or Fonts galleries to set colors or fonts independently.
Preview and print a report
Preview a report
- Right-click the report in the Navigation Pane and click Print Preview.
- Print the report
- Adjust page size or layout
- Zoom in or out, or view multiple pages at a time
- Refresh the data on the report
- Export the report to another file format.
- Click Close Print Preview.
Print a report
To print a report without previewing it:- Right-click the report in the Navigation Pane and click Print. The report is sent to your default printer.
Note: If you select the report in the Navigation Pane and select Print from the File tab, you can select additional printing options such as number of pages and copies and specify a printer.
- To open a dialog box where you can select a printer, specify the number of copies, and so on, click Print.


No comments